As much as I enjoy the power of desktop mind mapping applications and use them all of time in the work that I do, one of the tools that I am relying on more these days is Comapping, an online mind mapping collaboration tool. Comapping can be accessed from any computer and browser that is connected to the Internet and gives me the flexibility to organize my ideas, add hyperlinks as well as attachments. Comapping does a great job allowing you to share your maps when they are done and I have been taking advantage of this feature for years now when I teach my graduate courses. For each class I create an interactive agenda with Comapping and then publish it to my Moodle classroom account for all my students to access.
Recently I have done a number of workshops and needed a quick way for my participants to be able to jump from web site to web site to view the contents. Using Comapping I was able to create the agenda embed the hyperlinks which made the day go so much more smoothly for me. Publishing your Comapping maps to the web is really quite simple and easy to do and when you are done you are given a unique URL that you can then pass out to your students. Because the URL is rather long, I generally log into my Bit.ly account shorten it and customize the link so that when I get to the workshop I just have to give out the shortened URL.
Comapping is also unique in that it allows you to embed your attachments that your participants can access from the map. In the example below you will see that I have embedded a number of Quick Reference Cards for the SOLO training I have coming up. This will make it easy for my participants to access these reference materials on the day of the training as well as when they are back in their classroom. You will also see that there are live links to the Don Johnston Website for additional support videos that can be quickly accessed from the Comapping map. Using this technique not only saves me from printing costs and paper, but models for teachers what is possible as we move from analog to a digital materials. So interact with the Comapping map below and let me know you thoughts about using Comapping in the work that you do. If you are interested in learning how you can do this shoot me an email.
Showing posts with label brian friedlander. Show all posts
Showing posts with label brian friedlander. Show all posts
Sunday, September 4, 2011

Saturday, September 3, 2011
Run Flash on Your iPad with iSwifter

Saturday, August 27, 2011
Adobe FormsCentral Adds Email Notification
I have been using Adobe FormsCentral since its release and have found it really easy to create very professional looking forms which I have used for workshops, webinars, and demonstration registrations. One of the missing features of FormsCentral when it was initially released was the ability to be automatically notified when a form was submitted. Well that has all changed this week with the addition of this feature and now it is a cinch to get an email notification as well as a summary of the number of people who has responded in the body of the email. See the image below to see how easy it is to turn on this feature.
 With Adobe FormsCentral it is now easy to follow up with all of the submissions with email notification-give it a try and see for yourself.
Tuesday, August 16, 2011
Tweeting with ConceptDraw MINDMAP 7

To get started tweeting from within ConceptDraw MINDMAP you simply type your tweet within a topic and then click on the Tweet icon on the toolbar. Once you do this the Tweet dialog box comes up where you can preview or edit your tweet before sending it. ConceptDraw MINDMAP also allows you to automatically place a check mark within the topic to give you a visual cue that it has been tweeted. If you have hyperlinked a URL to a topic it will also come over in the tweet which is handy. With ConceptDraw MINDMAP you can quickly create a dashboard for your tweets so that you can see how your campaign is coming along. It would be nice if in future release if you were able to set the date and time of when your Tweets were sent. Likewise it would be great if you could generate a ConceptDraw MINDMAP from a Twitter hashtag or from a particular person you are following. Overall, ConceptDraw MINDMAP does a great job of integrating tweeting and provides me with a dashboard for my tweets - which gives me a great overview within a powerful mind mapping application.
http://www.tonkinnews.com
Thursday, August 4, 2011
Brainstorming With Quartet Kapture

Monday, August 1, 2011
Are You Using Flip Charts in Your Meetings?

Wednesday, July 20, 2011
Adobe is Offering Free eSeminars on Adobe Captivate & eLearning Suite
If you have moved up to Adobe Captivate 5.5 or the new eLearning Suite then you should consider signing up for these Free eSeminars that are being hosted by Adobe. Adobe Captivate 5.5 & eLearning Suite 2.5 breaks new ground for designing and developing rapid elearning courses. Find out how to accomplish more with these tools by attending these free seminars. Information about how to sign up is below. HOpe yo can make it!
 I would recommend registering for the eSeminars in advance by visiting Adobe’s Webinar site or using the links below. You’ll be prompted for your Adobe ID (creating one is easy and free) during registration and will receive detailed log-in information via email. NOTE: Click on the “test your computer” link to ensure you’ll be able to successfully log into the eSeminar.
I would recommend registering for the eSeminars in advance by visiting Adobe’s Webinar site or using the links below. You’ll be prompted for your Adobe ID (creating one is easy and free) during registration and will receive detailed log-in information via email. NOTE: Click on the “test your computer” link to ensure you’ll be able to successfully log into the eSeminar. Thursday, July 21 – 9 a.m. PT/noon ET
Join Dr. Pooja Jaisingh and Vish to learn how to use Adobe Captivate Reviewer to get your Captivate projects reviewed by the SMEs, internal team or customers. Also learn how to leverage Acrobat.com or your internal server in this process.
Wednesday, July 27 – 10 a.m. PT/1 p.m. ET
Join RJ Jacquez, Adobe Senior Product Evangelist, for a fun session on Photoshop, specifically designed for new users who are already familiar with Adobe Captivate. In this session, you learn how to get started using Photoshop for enhancing your Captivate projects, how to work with Layers and how to use the powerful content-aware fill tool for including just the right images in your eLearning projects.
Thursday, July 28 – 9 a.m. PT/noon ET
Join Vish and Dr. Pooja Jaisingh to learn more on video integration in Adobe Captivate 5.5. In this session, they will show different ways to insert video in Captivate and use them as an object or slide video. They will also demonstrate how to distribute the video to multiple slides as well as how to add video to TOC.
Thursday, August 4 – 8 a.m. PT/11 a.m. ET
Join Dr. Pooja Jaisingh and Vish for a hands-on session on how to add standard and interactive objects in Adobe Captivate 5.5. They will also discuss the best practices of using these objects in Adobe Captivate 5.5.
Wednesday, August 10 – 10 a.m. PT/1 p.m. ET
Join RJ Jacquez, Adobe Senior Product Evangelist, for a session on how to take audio editing beyond the features in Adobe Captivate using Adobe Audition. In this session you will learn best practices for moving your audio between Captivate and Audition, as well as tips for adding background audio that you can control with precision and more.
Monday, July 18, 2011
Read2Go is Released in the Apple App Store

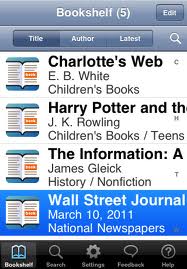
Read2Go looks great and I for one am going to highly recommend it to the students that I work with who have a "Print Disability." Please remember that you must have a Bookshare Account to download books to your iPad. Let me your thoughts about this new app that breaks new ground for students with reading disabilities.
Monday, July 4, 2011
Using the Livescrbe Pen to Develop eLearning Assets

In my workshop: Delivering e-Learning Assets in PDF Format- I showed my participants how I am using Adobe Acrobat Pro Extended, Adobe Captivate 4, Camtasia Studio, and Adobe Presenter to create rich and engaging eLearning assets. Using a combination of these tools it is possible to create some interesting materials that can be shared with the Adobe Acrobat Reader. One of the real take away's from the presentation is that it is now possible to embed video in your PDF's which your users can view with the free Adobe Acrobat Reader 10.
 One of the new tools on the horizon is the Livescribe Pulse and Echo Smartpens that makes the process of creating rich interactive PDF's a cinch. Just last week Livescribe added the the Livescribe Connect capability to output their penscasts in an interactive Adobe Acrobat format. Livescribe calls this format a Pencast PDF and it is really easy to create. So now it is easy for teachers to create instructional videos complete with audio on just about any topic you desire. If you have taken a look at the Khan Academy you will be able to create very similar videos with the same look and feel. The great thing is - it is so easy to accomplish with the Livescribe Smartpens. Open a page in a notebook - click the Record button and when you are finished recording plug the USB cable into your computer to upload your work to the Livescribe Desktop Software. Once your pencast has been uploaded on your computer simply drag the page under the Connector panel to the Computer option. This will automatically save the file in the Adobe Acrobat PDF format that can now be viewed by anyone who has the free Adobe Acrobat Reader.
Here is an example of what you can do with your Livescribe Pen to create an interactive instructional video. Click here to view or on the image below to view the Pencast PDF.

Thursday, June 30, 2011
Livescribe Releases Sound Stickers App

Saturday, June 25, 2011
Visit With Me ISTE 2011

PAPERSHOW Teacher’s Edition™ Ideal Tool for Special Education Co-Teaching Classrooms
CONTACT:
Brian S. Friedlander, Ph.D.
(908) 852-3460
brian (@) assistivetek.com
FOR IMMEDIATE RELEASE
PAPERSHOW Teacher’s Edition™ Ideal Tool for Special Education Co-Teaching Classrooms
International Society for Technology in Education (ISTE) Conference
The interactive writing solution is the Key to Effective Learning
PHILADELPHIA–June 26, 2011–AssistiveTek, LLC, top reseller of PaperShow For Teachers is excited to showcase the PAPERSHOW Teacher’s Edition™ , the key to effective learning, for the second time at the 2011 International Society for Technology in Education (ISTE) Conference, June 26-29 in booth 128.
The PAPERSHOW Teacher’s Edition is the ideal tool for use in special education and inclusion classrooms, helping teachers to create more visually appealing interactive presentations. With PAPERSHOW Teacher’s Edition™ teachers have access to a range of tools including, including an interactive calculator, magnifying glass, two measurement tools, lined paper for students learning to write and 72 different colors.
An essential tool for both the classroom and virtual teaching, PAPERSHOW consists of three elements: a wireless Bluetooth pen, a USB Key and interactive paper that work together to allow one to create a digital flip chart or annotate a Keynote or PowerPoint Presentation live. After a PAPERSHOW session, one can save it and then immediately print and/or email it to participants.
The PAPERSHOW Teacher’s Edition, combined with a projector and a computer, gives teachers the ability to transform their lessons and presentations into engaging interactions at a fraction of the cost of interactive whiteboards, as PAPERSHOW for Teachers costs just $249. The PAPERSHOW Teacher’s Edition starter kit, compatible with both Macs and PCs, includes one 128-page double-wired notebook, 30 sheets of interactive paper, one Bluetooth® digital pen, one 512MB Bluetooth ® USB Key with software embedded, one interactive extra toolbar, a ring binder, pen case and other accessories.
“The PAPERSHOW Teacher’s Edition is a great piece of technology. It will help to support co-teaching models in the classroom, when there is a special education and regular education teacher in the same classroom, and allow all students’ needs to be met inside the classroom,” said Diana Scharer, Special Education Teacher, Township of Union, Union, NJ. “With PAPERSHOW Teacher’s Edition, the special education teacher can record the notes and graphics and have them available for all students at the end of the period.”
The PAPERSHOW Teacher’s Edition works with Windows XP, Vista and 7 and the Mac operating systems Tiger, Leopard and Snow Leopard. PAPERSHOW features six different colors, three different brushstrokes, perfect shapes, lines and arrows all of which bring presentations, meetings and classes to life.
“Being able to export the notes in a PowerPoint and PDF format makes it great for students who need visual supports and accommodations. PAPERSHOW Teacher’s Edition speaks to the heart of Universal Design for Learning and offers all student s the classroom the benefits of a highly interactive and visual appealing notes,” Scharer continued. “Teachers who are using PAPERSHOW Teacher’s Edition enjoy the fact that they can move about the classroom and put their ideas up on the board as well as having students record their ideas on the digital notepad from their desks.”
For more information, and ideas on how to use PAPERSHOW Teacher’s Edition in the classroom, visit, assistivetek.blogspot.com
###
About AssistiveTek, LLC
Since 2000, AssistiveTek, LLC has been providing products and professional services in the area of educational and assistive technology to educators. AssistiveTek, LLC delivers innovative products that help students to visualize ideas and concepts and helps teachers to integrate these tools in the curriculum.
AssistiveTek, LLC is one of the leading resellers of PAPERSHOW Teacher’s Edition in the United States and provides support and in-service programs to demonstrate how this innovative technology can be used in the classroom to support all learners.
Brian S. Friedlander, Ph.D.
(908) 852-3460
brian (@) assistivetek.com
FOR IMMEDIATE RELEASE
PAPERSHOW Teacher’s Edition™ Ideal Tool for Special Education Co-Teaching Classrooms
International Society for Technology in Education (ISTE) Conference
The interactive writing solution is the Key to Effective Learning
PHILADELPHIA–June 26, 2011–AssistiveTek, LLC, top reseller of PaperShow For Teachers is excited to showcase the PAPERSHOW Teacher’s Edition™ , the key to effective learning, for the second time at the 2011 International Society for Technology in Education (ISTE) Conference, June 26-29 in booth 128.
The PAPERSHOW Teacher’s Edition is the ideal tool for use in special education and inclusion classrooms, helping teachers to create more visually appealing interactive presentations. With PAPERSHOW Teacher’s Edition™ teachers have access to a range of tools including, including an interactive calculator, magnifying glass, two measurement tools, lined paper for students learning to write and 72 different colors.
An essential tool for both the classroom and virtual teaching, PAPERSHOW consists of three elements: a wireless Bluetooth pen, a USB Key and interactive paper that work together to allow one to create a digital flip chart or annotate a Keynote or PowerPoint Presentation live. After a PAPERSHOW session, one can save it and then immediately print and/or email it to participants.
The PAPERSHOW Teacher’s Edition, combined with a projector and a computer, gives teachers the ability to transform their lessons and presentations into engaging interactions at a fraction of the cost of interactive whiteboards, as PAPERSHOW for Teachers costs just $249. The PAPERSHOW Teacher’s Edition starter kit, compatible with both Macs and PCs, includes one 128-page double-wired notebook, 30 sheets of interactive paper, one Bluetooth® digital pen, one 512MB Bluetooth ® USB Key with software embedded, one interactive extra toolbar, a ring binder, pen case and other accessories.
“The PAPERSHOW Teacher’s Edition is a great piece of technology. It will help to support co-teaching models in the classroom, when there is a special education and regular education teacher in the same classroom, and allow all students’ needs to be met inside the classroom,” said Diana Scharer, Special Education Teacher, Township of Union, Union, NJ. “With PAPERSHOW Teacher’s Edition, the special education teacher can record the notes and graphics and have them available for all students at the end of the period.”
The PAPERSHOW Teacher’s Edition works with Windows XP, Vista and 7 and the Mac operating systems Tiger, Leopard and Snow Leopard. PAPERSHOW features six different colors, three different brushstrokes, perfect shapes, lines and arrows all of which bring presentations, meetings and classes to life.
“Being able to export the notes in a PowerPoint and PDF format makes it great for students who need visual supports and accommodations. PAPERSHOW Teacher’s Edition speaks to the heart of Universal Design for Learning and offers all student s the classroom the benefits of a highly interactive and visual appealing notes,” Scharer continued. “Teachers who are using PAPERSHOW Teacher’s Edition enjoy the fact that they can move about the classroom and put their ideas up on the board as well as having students record their ideas on the digital notepad from their desks.”
For more information, and ideas on how to use PAPERSHOW Teacher’s Edition in the classroom, visit, assistivetek.blogspot.com
###
About AssistiveTek, LLC
Since 2000, AssistiveTek, LLC has been providing products and professional services in the area of educational and assistive technology to educators. AssistiveTek, LLC delivers innovative products that help students to visualize ideas and concepts and helps teachers to integrate these tools in the curriculum.
AssistiveTek, LLC is one of the leading resellers of PAPERSHOW Teacher’s Edition in the United States and provides support and in-service programs to demonstrate how this innovative technology can be used in the classroom to support all learners.
Thursday, June 16, 2011
PaperShow for Teachers - Interesting Classroom Use
 Today I had the opportunity to work with a teacher and show her how she could use PaperShow for Teachers in the classroom. As luck would have it, all of her students were going to be taking the NJ Drivers Written Exam and she needed to review the material with them. Rather than do a traditional question and answer session the teacher began to draw different scenarios on the PaperShow for Teachers notebook that the students could visualize and then annotate on the paper. The session was extremely engaging and interactive but more importantly the students really enjoyed writing on the PaperShow for Teachers notebook and reviewing the material. You can see above one of the images that was captured during the session. For an entire period we were able to engage the students in a highly interactive fashion and help them review key points that they could expect to know for the NJ Drivers Written Exam. How are you using PaperShow for Teachers in the classroom? Interested in learning how you can use PaperShow for Teachers in the classroom? If so, then sign up here for a free webinar.
Sunday, June 12, 2011
SmartDraw VP Upgrade -Adds New Mind Mapping Features
If you follow the mind mapping arena you will probably have noticed the blogs and videos that SmartDraw has created about the benefits of visual communication. The videos are done very well and really speak to the heart of the issue- with the right visuals we can all be more efficient and productive at what we do.SmartDraw VP has a good balance of tools for many of the tasks that you may need to accomplish throughout the day. While the mind mapping features that are found in SmartDraw VP are not as extensive as a stand alone application there is a synergy among the tools that might make it an ideal tool for the work you do. The mind mapping tool in SmartDraw VP is ideal for brainstorming, project planing and for developing time lines. SmartDraw VP lets you quickly move from the mind mapping view to a time line or Gantt chart view with a click of the mouse.

In the recent upgrade to SmartDraw VP you will now be able to format your mind map Center, All Right or All Left giving you new options for how your mind maps are displayed on the screen. I for one find that many people who are not familiar with mind mapping have an easier time when I present a mind map using the All Right formatting. Similarly, it is now really easy to create a mind map in SmartDraw VP by importing a text outline. I tried this feature by typing a simple outline into the Notepad and importing it into SmartDraw VP. After each main idea I pressed the Enter key and for each subtopic I used the Tab key to indent the text. Once I had my outline completed I used the new Import Text Outline feature and voila there I had a perfectly formatted mind map.If you are eligible I would highly recommend that you upgrade to the latest version of SmartDraw VP so that you can take advantage of these new mind mapping features. SmartDraw VP is a handy tool with lots of ways to help you become more productive in your working environment. If you haven't taken a look at SmartDraw VP, it has a good balance of tools that can give you the edge as you head down the path to becoming a better visual communicator. You can download a 30 day trial of SmartDraw VP by clicking on this link.

In the recent upgrade to SmartDraw VP you will now be able to format your mind map Center, All Right or All Left giving you new options for how your mind maps are displayed on the screen. I for one find that many people who are not familiar with mind mapping have an easier time when I present a mind map using the All Right formatting. Similarly, it is now really easy to create a mind map in SmartDraw VP by importing a text outline. I tried this feature by typing a simple outline into the Notepad and importing it into SmartDraw VP. After each main idea I pressed the Enter key and for each subtopic I used the Tab key to indent the text. Once I had my outline completed I used the new Import Text Outline feature and voila there I had a perfectly formatted mind map.If you are eligible I would highly recommend that you upgrade to the latest version of SmartDraw VP so that you can take advantage of these new mind mapping features. SmartDraw VP is a handy tool with lots of ways to help you become more productive in your working environment. If you haven't taken a look at SmartDraw VP, it has a good balance of tools that can give you the edge as you head down the path to becoming a better visual communicator. You can download a 30 day trial of SmartDraw VP by clicking on this link.
Wednesday, June 1, 2011
MindGenius 4 is Released
 MindGenius has been on the fast track with its development cycle and has released MindGenius 4 which is packed with some very useful features. MindGenius 4 adds a new Brainstorming mode which makes it very easy to record your ideas. MindGenius users will also like how the brainstorm session can be associated to a particular question n a Question set which can help to focus the session. Once you are done with the brainstorming session you can create a Question - Centric map based on what you brainstormed that is well organized using the questions as the primary node and the ideas the sibling nodes. This is an extremely useful feature and one that I know many mind mappers will find invaluable.
MindGenius 4 has now added a presentation mode to the product which makes it an ideal tool for developing and presenting your ideas. The Presentation view is easy to use and for those of us that have been PowerPoint to death- using mind maps for our presentations is a refreshing alternative. MindGenius had added lots of other features to the Project Management side of the software package which I will address in another blog post. But for now, download the free Trial of MindGenius and explore all of the new and exciting productivity features that have added to this new version.
Friday, May 20, 2011
AssistiveTek Launches iPad Summer Institute

One Day iPad Summer Institute
Held in the Warren Middle School
Two (1 Day) Sessions of the Summer Institute will be offered on
Dates: July 12 or July 13th
Presenters
Brian S. Friedlander, Ph.D. & Christine Besko-Maughan, M.S., ATP
Using the iPad to Enhance Learning & Facilitate Communication for Students with Special Needs
The iPad is a revolutionary technology that is changing the way educators present information in the 21st century classroom. The multi-sensory design of the iPad appeals to all learning styles and is an ideal tool for students with special needs. In this workshop, educators will learn about a variety of applications (apps) that address academic skills such as reading, writing, mathematics, and science. Communication apps designed for individuals with limited functional communication abilities will also be explored. The presenters will highlight Proloquo2Go and iCommunicate, as well as other apps designed to enhance language development. Strategies for implementation and best practices will be discussed. Attendees are encouraged to bring an iPad for a hands-on learning experience that will transform their teaching strategies.
Seating is limited so register early! Registration Fee: $99
School Purchase Orders are Accepted made payable to AssistiveTek, LLC,
174 Stephensburg Road, Port Murray, NJ 07865
174 Stephensburg Road, Port Murray, NJ 07865
Conference Location: Warren Middle School, 100 Old Stirling Road, Warren, NJ 07059
Online Registration Form
Thursday, December 30, 2010
Skype for iPhone Now with Video Calls
I could remember back to 1964 at the New York's World Fair being transfixed as I spoke to my mother an father and was able to see them on the video phone in the ATT Pavilion. It sure has taken a long time for the idea of video calls to take hold. But if there is one prediction which will really take hold in 2011 it will be how we begin to make more and more video calls on our mobile phones. Apple lead the way this year with their application FaceTime running on the iPhone 4 and iPod Touch, allowing users to have video conferencing calls on the go when they are within earshot of a Wifi network. Skype today announced the release of Skype for iPhone which is free that will allow users to place video calls over a 3G or Wifi network.
With Skype, you can:
So enjoy the New Year and reach out and touch someone with Skype for the iPhone!

With Skype, you can:
- Make video calls to people on their computers as well as other iPhones (details below)
- Make free audio calls to anyone else on Skype
- Make great value calls to landlines and mobiles around the world
So enjoy the New Year and reach out and touch someone with Skype for the iPhone!
Friday, December 24, 2010
aHa!Visual Web Export for MindManager 9
I find myself spending more times these days creating and putting up more information on the web for both the classes the I teach and the workshops that I facilitate. As a result, I am always looking for tools that will make it easier for me to accomplish these goals. I spend a lot of time using various mind mapping tools to brainstorm and communicate the ideas and information that I will cover in my sessions. I tend to use MindManager 9 now to create a lot of my materials and have been looking for a way to quickly be able to output my maps on the web. Several years ago I had reviewed aHa!Visual Web Export and found it to be an easy to use solution for moving my MindManager maps to the web. Since moving to MindManager 9 , I had a chance to take a look at the aHa!Visual Web Export plug-in which was recently updated to work with the latest version of Mindjet MindManager version 9.
 Installing aHa!Visual Web Export was extremely simple process. To export your MindManager 9 mind map to the web you Select from the File Menu Export as Web Pages and then you will see an option to Export using the aHa!Visual Web Export plug in. While there are lots of ways to customize how the map will render on the web page- it is easy enough to select the default options and save your outputted files to a folder on your desktop. Once you save the outputted files you can simply upload them to your server to display them. I found the process very easy to do and within minutes I was able to view my map on the web. All of your notes and web page links are live when they are exported. You can click on this link to view the output from aHa!Visual Web Export. I would highly recommend aHa!Visual Web Export if you are looking for fast way to share your MindManager 9 maps to the web.

Saturday, December 4, 2010
Sharing Ideas with PaperShow for Teachers in the Classroom


While many PaperShow for Teachers users-use it to deliver more engaging presentations, PaperShow for Teachers is an ideal tool for actively engaging students when they need to analyze or annotate images, diagrams or pictures. Using the PaperShow for Teachers application that resides on the USB key you can quickly bring in a series of images- print them using a color printer on the 8 1/2 x11 interactive paper and be ready to use them with the digital pen to mark up. Simply place the images you would like to use in a folder and PaperShow for Teachers will dutifully import them and get them ready to print on the interactive paper.Once the images are printed on the paper you can use all of the PaperShow for Teachers tools to annotate and mark up the images. This feature gives teachers the flexibility to bring in whatever pictures they need for a particular lesson. Once you do one time you will see just how easy it is do accomplish and how much fun it is to use in the classroom. So make you lessons more interactive by printing images with PaperShow for Teachers and then pass the binder with the images around the classroom to engage the students. Using images, students can identify certain features on the picture, comment about the picture, add additional ideas and then save them if it so desired.
At just $249 dollars, PaperShow for Teachers gives you tremendous value and a way to engage students in the classroom by providing them more opportunities to participate and interact with ideas and images. Contact me if you would like a free demonstration of PaperShow for Teachers.
Monday, November 29, 2010
New and Improved Adobe Acrobat X
Adobe Acrobat remains one of the best kept secrets in the software industry. While many users, use the ubiquitous Adobe Acrobat Reader to open, print and display files on the web- many are unaware of the engine that makes this all happen. I have been fortunate enough to be provided with a Reviewer Copy of Adobe Acrobat X Pro which was recently released into the marketplace. As a long time user of Adobe Acrobat I was looking forward to working with the latest version of Acrobat to see what new and innovative features were build into this version. Adobe Acrobat X is now available for both Windows and Macintosh computers and builds on the long tradition of Acrobat as easy to use tool to create and publish PDF files.
 The most significant change that you will see when you start up Adobe Acrobat X is in the interface. If you have used any of Adobe's newer applications you will feel right at home. Adobe has really done their homework and analyzed how users are most likely to use Acrobat and reconfigured the menus. You will notice on the right had side of the screen three different tabs, Tools, Comments, and Share. Clicking on any of these items will reveal a Pane with the associated tools and features. Being a long time user of Acrobat it was always a challenge to find where I might find the tool that I was looking for. Having the new interface now makes it a cinch to know exactly where to find something. The new interface is very intuitive and makes it easy for you to be as efficient as possible when you are looking for the right tool. The simplicity of the interface is going to be a hallmark of this version and one that I know I will enjoy using.
 Creating PDF files is a lot easier to create with the new version of Adobe Acrobat X. Simply select the Create button from the menu and you have your choice of how you would like to create your PDF. One of the areas that has been vastly improved is creating a PDF from Scanner. I found that Adobe Acrobat X was much faster at creating the PDF and the finished PDF file size was much smaller than in the past. There were significant improvements in the Optical Character Recognition Engine which would account for better recognition of scanned material. Having a fully search-able PDF document with a small footprint really foots the bill for me.
One of my favorite features which was introduced in version 9 of Acrobat is the concept of a PDF Portfolio. This is an extremely powerful tool and one that I feel has the potential to take this product far both in business and education sectors. As the term would implies a PDF Portfolio is a way for you to include a range of different types of files and media formats and wrap it up in a PDF envelope. With a PDF Portfolio one could include a Word, Excel, Audio, Video, PDF documents and convert it into one single PDF file that can be delivered to your client or student. When they receive the PDF Portfolio you can package it and brand it with your company's colors or logo. Your recipient then receive I highly stylized PDF portfolio with easy to use navigation that can be opened with the free Adobe Acrobat Reader (version 9 or X) and presented with the files in the order that you wold like to present them in. Perfect for a business or educational portfolio which displays a range of different content and media. Adding video and Flash content is easier than ever and allows you to bring your documents to life with video playing inside your PDF portfolios.
 Sending your PDF documents just got a lot easier with the advent of the new Adobe Service called Adobe SendNow Online. Adobe SendNow Online. is now integrated within Adobe Acrobat X and can be accessed from the Share tab. Adobe SendNow Online, as you can tell from the name, stores your files in the cloud and provides a link to your PDF that you can email to your recipients right within Adobe Acrobat X. If you have ever had the problem of sharing large PDF files via email, then you will really like how Adobe handles this new feature. Simply enter the recipients email address and they will receive a link to download the file. It is really that simple and you can control how much time they have before the link expires and receive delivery receipts when it is downloaded. The integration of Adobe SendNow Online with Adobe Acrobat X is really seamless and you will be asking yourself how did you ever live without it.
Working with Adobe Acrobat as much as I do, I am extremely pleased with this upgrade and the thought that went into making this easier and more intuitive to use. Right out of the box you will find Adobe Acrobat X a pleasure to work with. With a little time you will find that Adobe Acrobat X is one of thiose must have applications that you will turn to for all of your creative needs.
PS: Look for another post on the Action Wizard and Forms coming soon

One of my favorite features which was introduced in version 9 of Acrobat is the concept of a PDF Portfolio. This is an extremely powerful tool and one that I feel has the potential to take this product far both in business and education sectors. As the term would implies a PDF Portfolio is a way for you to include a range of different types of files and media formats and wrap it up in a PDF envelope. With a PDF Portfolio one could include a Word, Excel, Audio, Video, PDF documents and convert it into one single PDF file that can be delivered to your client or student. When they receive the PDF Portfolio you can package it and brand it with your company's colors or logo. Your recipient then receive I highly stylized PDF portfolio with easy to use navigation that can be opened with the free Adobe Acrobat Reader (version 9 or X) and presented with the files in the order that you wold like to present them in. Perfect for a business or educational portfolio which displays a range of different content and media. Adding video and Flash content is easier than ever and allows you to bring your documents to life with video playing inside your PDF portfolios.

Working with Adobe Acrobat as much as I do, I am extremely pleased with this upgrade and the thought that went into making this easier and more intuitive to use. Right out of the box you will find Adobe Acrobat X a pleasure to work with. With a little time you will find that Adobe Acrobat X is one of thiose must have applications that you will turn to for all of your creative needs.
PS: Look for another post on the Action Wizard and Forms coming soon
Subscribe to:
Posts (Atom)