Showing posts with label camtasia studio 6. Show all posts

Monday, December 14, 2009

Screencasting for the Masses with Camtasia Studio 6 & Adobe Captivate 4.

Yesterday I had the privilege to present at 21st Century Learning Conference which was sponsored at by the Center for Innovative Education on the campus of Kean University. My first session was titled: Screencasting for the Masses with Camtasia Studio 6 & Adobe Captivate 4. It was very exciting to see the interest in this offering as the room quickly filled to capacity. Some of the educators had shared that the presentation was very timely, since they had just ordered the software to experiment with, in their districts. One of the overriding questions about the screencasting technology was just how long would it take to produce a video tutorial? Even though I shared with them that these tools were intended for the development of rapid eLearning material- it was going to take them some time to learn how to use the tools before they felt comfortable being able to create these assets quickly. Like anything else, with a little practice their skills would certainly improve and allow them to create materials that much faster.

I think that everyone who attended my presentation was floored with the quality of the finished videos that could be produced using Camtasia Studio 6 and Adobe Captivate 4. Many of the teacher present saw the value of creating these materials and more and more schools are now requiring their teachers to maintain a website and post materials. What better way to show students how to do something then with a video demonstration that can be streamed over the web.

During the course of the presentation I shared with my audience some tips and tricks and how to master the skills to do screencasting. I explained how it was important it was to script the video from the onset before having the urge to record. Once you start to record it is important to think about the audio and to keep your productions somewhere between two to four minutes in length. The post production work is where the fun begins and depending how compulsive you are- it can take a lot of time to edit your video. After the video is complete you will need to upload it to your server or host it for others to view. It is important to decide beforehand how you intend to use the video and where it will be hosted and what types of devices you intend to access the video. There are certainly lots of things to think about when using this technology but the outcome is certainly worth the investment of time.

If you are interested in learning how to use Camtasia Studio 6 or Adobe Captivate 4- please feel free to contact me for training and workshops. I can provide you with one on one coaching and training right over the web at your convenience. To get in touch with me click here.

Here are two examples that I used during my presentation showing off the two programs. Click on the image to view the video.

The following video was created with Camtasia Studio 6


The following video was created using Adobe Captivate 4 and CodeBaby


Saturday, September 19, 2009

Putting eLearning on the Map

I just got finished reading in Education Week, Swine-Flu Plans Put E-Learning in the Spotlight and was thinking that with the potential for the H1NI virus to close schools across the United States this Fall, it is time for administrators, technology directors and teachers to consider some stop gap measures so there is continuity in instruction. Over the past couple of years business has relied more and more on the internet for the presentation of information. Using services like Glance, Adobe Connect Pro, Adobe ConeectNow, Webex, Elluminate, GotoMeeting, and Dimdim businesses have saved millions of dollars and have been able to effectively provide high quality professional development. I know from my own participation in many webinars how much I have learned over the past two years. It is time that schools begin to invest in these services so that the school day can be extended beyond 3.00 pm. When looking at the potential for many school closing because of the H1NI virus it would prudent for schools to invest and learn how to deliver instruction using these powerful technologies. Yes- I know not everyone has access to the internet in their home's but there are opportunities for community centers and libraries to be able to host the sessions, if needed. Using these aforementioned technologies with built-in Voice Over Internet Protocol, teachers can reach out to their students and continue to provide instruction.

Teachers may also want to look into using Skype to keep in touch with their students using the video-conferencing feature or audio features. With an inexpensive webcam it is possible to deliver instruction to small groups of students at no cost! Students would be able to see their teacher and ask questions as if they were in their classroom. I can remember growing up in New York City during one of the longest teacher strikes and having my teachers meet in the basement of one of our home's to teach us. Now with the advent of Skype and similar technologies teachers could deliver instruction without leaving their home.

In the interim what can schools do to provide continuity of instruction if school closings become an inevitability? For one, there are a number of free or inexpensive resources that could help schools provide teacher materials to their students. Teachers can begin to look at creating a wiki (PBWiki) that would allow them a central point to communicate and store files or start a blog (Blooger) with linked resources to stay in touch with their students. Teachers can also create materials using Google Docs and post links from the school website so that students can access them. It would also be a good idea for teachers to begin to collect student or parent's emails so that in the event that there needs to be communication-teachers could send out an email with information.

Some schools have already implemented Blackboard or Moodle which can provide a great learning environment for students with access to materials, discussion boards, links and resources. For teachers who do not have access to the aforementioned services you may want to take a look at creating a Google Site which is free. Google Sites are free and relatively easy to set up. Google Sites provide the ability to set permissions and control access while providing tools to create engaging learning environments.

One of the technologies that I have been using for some time in the courses that I teach is screencasting. This technology allows you as the teacher to capture anything that is on your computer screen including the audio. Imagine for a moment being able to solving a math problem and show your students how to do it step by step as if they were in your classroom. Well in fact using screencasting technology it is possible and relatively easy to do. For the past several years I have used Camtasia Studio and Adobe Captivate to create my screencasts which I have used on my blog and in the classes that I teach. For those of you that are looking for a free solution you can take a look at Jing and Screenr. To get started using these program open the application that you want to use- connect your microphone and hit the Record button. That's all there is to it. Once you are done you can post your movies to the web and have your students access them. Each 3-5 minutes video can highlight a new concept or idea and instruct your student on the days lesson. if you have an interactive whiteboard in your classroom-many of the notebook software applications have the recording feature built-in to capture a screencast.

Over the past year I have been writing about various digital pen technologies that can open the door to screencasting which have tremendous teaching potential. The Livescribe Pulse Smartpen is an ideal tool for creating pencasts. Just turn in on and start writing and talking, when you are done upload your pencast to the web- get the URL and your students can watch and listen to you over the web. If you are using PowerPoint in your classroom you should take a look at 
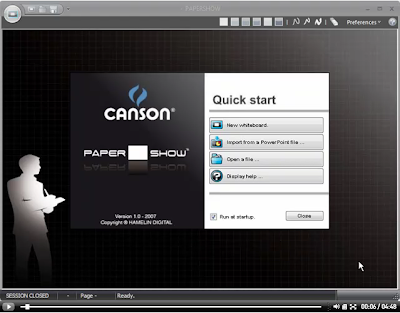
Papershow which allows you to annotate your PowerPoint presentations and using a tool like Jing it is easy to record your session for playback. Papershow is an ideal tool when used in a distance learning and when doing webinars. When using Papershow in conjunction with screensharing methodologies it offers teachers the ability to have an interactive whiteboard to share their ideas and lessons over the internet. Imagine having the ability to write on a piece of paper and your students will see everything that you are writing. At the end of the session you can then save your notes as a PDF or email them to your students.

While no one can predict if there will be an outbreak of the N1H1 virus there are steps that schools can begin to make to insure the continuity of instruction using today's e-learning tools. First and foremost- schools need to have a reliable and effective way to communicate with their students and or families via email or the web. Schools should begin to think about how they intend to communicate to the families and work with teachers to help set up their web pages or sites to disseminate information. As I shared with you there are lots of ways that teachers could provide continuity of instruction should their schools have to remain closed for a period of time. While there are lot of new and exciting technologies to deliver instruction over the internet - schools should begin to explore how these can be incorporated with their plans in the event that schools will be closed. In any case, schools need to explore how these elearning technologies and Web 2.0 can enrich the instruction in the classroom and begin utilize these tools for developing opportunities for student learning beyond the school day. It is time that all schools look into delivering learning using these new and exciting eLearning tools.

Saturday, August 8, 2009

Camtasia for Macintosh to Be Released - August 25th

I know it has been a long time coming and I am glad to announce that Techsmith will be releasing Camtasia for the Macintosh on August 25th for a special promotional price of $99 dollars until the end of the year. After that Camtasia for the Mac will be priced at $149. I know I have been waiting for this awhile now and I am sure this will become an important part of your instructional toolkit once it is released. I will be talking more about Camtasia for the Mac in future posts.

Saturday, April 4, 2009

Using PaperShow with PowerPoint

In previous blog posts I have shared with you how I am successfully using PaperShow in my classes as a digital flipchart. It has been great to be able to write my ideas on the interactive digital paper and have them show up on the screen. Using the computer and the data projector with PaperShow has really made it easy for me to communicate ideas and have them displayed for my students on the screen. What is nice is that there is no hardware and software to install-everything you need is on the PaperShow USB Bluetooth Drive.

This past week I explored another feature of PaperShow which allowed me to import a PowerPoint presentation into the PaperShow software and print it out on the supplied interactive paper. Once you have printed your PowerPoint presentation out on the interactive paper you can now take out your digital pen and mark it up so that your paprticpants see the slide with your written annotations. If you have not used digital pen technology there is a "wow factor" that comes over others watching as you write with a pen and they see the changes being made live to your presentation. I have created a short screencast to show you how to import your PowerPoint presentation into PaperShow. Enjoy! Brian

Monday, January 26, 2009

Back to Teaching

With the new semester just beginning I have been preoccupied with getting my graduate classes set up and running. It is always exciting to start a new semester full of new ideas and ways to deliver and instruct my classes. Last week I had a chance to use PollEveryWhere in my class and it worked like a charm. My students were impressed and enjoyed the opportunity to learn a new technology that they may be able to use in their classroom. I plan on using more digital assets for my hybrid courses using tools like Camtasia Studio 6, Adobe Captivate, Adobe Acrobat 9, and Adobe Presenter which I can utilize wtih BlackBoard.

For the past couple of months I have been developing an Assistive Technology eBook with a colleague, complete with video tutorials that should be out in a couple of weeks. More to come about this eBook in a couple of days. It is an exciting project and one that shows the true potential of these various tools for educational purposes. The final product will be delivered as a downloadable PDF file taking advantage of Acrobat 9 now being able to play video's with nothing more than Acrobat Reader 9. Boy we have come a long way!

So stay tuned to this blog for more information about the Assistive Technology eBook and my reflections on using more digital assests in my courses using the aforementioned software applications.

Tuesday, January 6, 2009

Jing Pro Released


If you have been a Jing User you will be happy to learn that TechSmith has released Jing Pro today for only $14.95 a year. So what do you get with the release of Jing Pro:

So, what's new with Jing Pro? Betsy Weber, TechSmith's Chief Evangelist sums it up

  • YouTube support. You can upload a video to YouTube directly from Jing. Jing also gives you the link to your video.
  • For screencasts, in addition to the SWF file format, Jing Pro now offers a H.264/MPEG-4 AVC format video option. Without getting too technical, this format excels at capturing video with a lot of motion, is much more suited for editing, and is supported on YouTube. And, for those of you who have been wanting to tweak your Jing videos, you can now import them into Camtasia Studio 6 or iMovie to edit, merge or anything you want.
  • Branding removal. At the end of a Jing Pro-produced video, there is no Jing logo and branding.

You can upgrade to Jing Pro for $14.95 a year. And, we're not forcing you to upgrade to Jing Pro. The free version of Jing is still available complete with complimentary hosting on Screencast.com (2 GB of storage and 2 GB of transfer bandwidth per month). And, we also have free tech support for both Jing and Jing Pro. There is a great Help Center for Jing that is full of tips and tricks.

Thursday, December 18, 2008

MindManager 8 Web Services Video Up

Each month for the past year I have produced a video tutorial or tip for Mindjet Connections Newsletter and I am happy to report this month's video is up on the topic of Web Services, a new feature found in MindManager 8. MindManager 8 Web Services offers users some very powerful search features that can be accessed right within the MindManager8 without having to leave the application. In the video I demonstrate how you can use both the Amazon and Google Web Services right within MindManager 8. I hope you enjoy the video tutorial.

Friday, November 28, 2008

Experience Task Automation Capabilities within MindManager 8 for Windows

If you haven't taken a look at some of the new features in MindManager 8 then you should take a look at this video tutorial that I put together for the November Mindjet Connections Newsletter on the new Task Automation Capabilities.

Saturday, November 15, 2008

Camtasia Studio 6- Impressive!

As a long time user of Camtasia Studio, I was excited to learn that TechSmith had just recently released Version 6. For those of you who have been using Camtasia Studio 5, you will feel right at home with the latest version- which is a good thing. I am always concerned when software companies make drastic changes to the interface when they release new versions of the software. Having stated this up front, TechSmith has spent considerable time and taken user input in designing this latest version. I for one feel that the workflow is much smoother and some of the subtle changes in the interface make the whole experience of using Camtasia Studio 6 much more enjoyable. From the first time you record a session you will notice a whole new recording interface which is much more intuitive and allows you to set up your recording features without the need to jump through a whole lot of screens.
Everything is right there in front of you as you see in the screenshot. You can now easily adjust your audio, select your screen size, as well as your webcam from the Record pane.

When you are ready to record just click in the big Record button and you are ready to record high quality video and audio form your computer. You will be happy to learn that you can now use Camtasia Studio to record in High Definition (HD- H.264) should you need to. After recording your video you can quickly preview your video in the newly designed Preview screen. The interface is very clean and neat and it is very clear how to save, edit, delete or produce your video. By clicking on the edit button you are taken to the very familiar Camtasia Studio screen to edit and produce your work. While not much has changed with regard to the interface there is lots of changes under the hood which will benefit all of us who work with this wonderful tool. This is the first version of Camtasia Studio that lets you decouple the video and audio which will make it easier to make edits and re-record the audio for retakes. TechSmith has now added a number of Hotkeys which will allow us to quickly add captions, callouts, zoom, and markers to the timeline. Just today I created a video and wanted to add a zoom in- and by simply pressing the letter z, I was able to bring up the Pan and Zoom dialog box and insert the zoom. This is certainly going to reduce the amount of time it takes to create and produce my videos. Like I said before, a lot of work has gone on under the hood which we will greatly benefit from. When it comes time to produce our videos TechSmith has really listened to our call and with the Production Wizard we can now output our videos to some of the most popular formats without the need to worry about the settings. We can now produce videos in High Definition (HD), SWF, as well as produce it for YouTube, Screencast and for the iPhone by going through the Production Wizard. In every case you will get perfect video and audio for that platform which is extremely important from my perspective- no need to guess. If you have a Screencast account you will appreciate just how easy it is to store and post your videos to your blog or web. The integration is seamless and within minutes you can have your video on your web or blog.


TechSmith has done a great job of listening to its users and making it even easier to produce high quality screencasts. It is the subtle changes and the work under the hood that will change your workflow and make you more productive using Camtasia Studio 6. The videos that I have recently recorded with Camtasia Studio 6 are very sharp with excellent audio fidelity. If you are on the fence about the upgrade to Camtasia Studio 6 take the plunge and see all of the benefits that you will derive with this very substantial upgrade. You can also download a 30 day trial of Camtasia Studio 6 form the TechSmith web site.