Showing posts with label screencast. Show all posts

Monday, December 14, 2009

Screencasting for the Masses with Camtasia Studio 6 & Adobe Captivate 4.

Yesterday I had the privilege to present at 21st Century Learning Conference which was sponsored at by the Center for Innovative Education on the campus of Kean University. My first session was titled: Screencasting for the Masses with Camtasia Studio 6 & Adobe Captivate 4. It was very exciting to see the interest in this offering as the room quickly filled to capacity. Some of the educators had shared that the presentation was very timely, since they had just ordered the software to experiment with, in their districts. One of the overriding questions about the screencasting technology was just how long would it take to produce a video tutorial? Even though I shared with them that these tools were intended for the development of rapid eLearning material- it was going to take them some time to learn how to use the tools before they felt comfortable being able to create these assets quickly. Like anything else, with a little practice their skills would certainly improve and allow them to create materials that much faster.

I think that everyone who attended my presentation was floored with the quality of the finished videos that could be produced using Camtasia Studio 6 and Adobe Captivate 4. Many of the teacher present saw the value of creating these materials and more and more schools are now requiring their teachers to maintain a website and post materials. What better way to show students how to do something then with a video demonstration that can be streamed over the web.

During the course of the presentation I shared with my audience some tips and tricks and how to master the skills to do screencasting. I explained how it was important it was to script the video from the onset before having the urge to record. Once you start to record it is important to think about the audio and to keep your productions somewhere between two to four minutes in length. The post production work is where the fun begins and depending how compulsive you are- it can take a lot of time to edit your video. After the video is complete you will need to upload it to your server or host it for others to view. It is important to decide beforehand how you intend to use the video and where it will be hosted and what types of devices you intend to access the video. There are certainly lots of things to think about when using this technology but the outcome is certainly worth the investment of time.

If you are interested in learning how to use Camtasia Studio 6 or Adobe Captivate 4- please feel free to contact me for training and workshops. I can provide you with one on one coaching and training right over the web at your convenience. To get in touch with me click here.

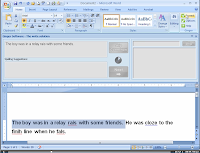
Here are two examples that I used during my presentation showing off the two programs. Click on the image to view the video.

The following video was created with Camtasia Studio 6


The following video was created using Adobe Captivate 4 and CodeBaby


Saturday, August 8, 2009

Camtasia for Macintosh to Be Released - August 25th

I know it has been a long time coming and I am glad to announce that Techsmith will be releasing Camtasia for the Macintosh on August 25th for a special promotional price of $99 dollars until the end of the year. After that Camtasia for the Mac will be priced at $149. I know I have been waiting for this awhile now and I am sure this will become an important part of your instructional toolkit once it is released. I will be talking more about Camtasia for the Mac in future posts.

Saturday, November 15, 2008

Camtasia Studio 6- Impressive!

As a long time user of Camtasia Studio, I was excited to learn that TechSmith had just recently released Version 6. For those of you who have been using Camtasia Studio 5, you will feel right at home with the latest version- which is a good thing. I am always concerned when software companies make drastic changes to the interface when they release new versions of the software. Having stated this up front, TechSmith has spent considerable time and taken user input in designing this latest version. I for one feel that the workflow is much smoother and some of the subtle changes in the interface make the whole experience of using Camtasia Studio 6 much more enjoyable. From the first time you record a session you will notice a whole new recording interface which is much more intuitive and allows you to set up your recording features without the need to jump through a whole lot of screens.
Everything is right there in front of you as you see in the screenshot. You can now easily adjust your audio, select your screen size, as well as your webcam from the Record pane.

When you are ready to record just click in the big Record button and you are ready to record high quality video and audio form your computer. You will be happy to learn that you can now use Camtasia Studio to record in High Definition (HD- H.264) should you need to. After recording your video you can quickly preview your video in the newly designed Preview screen. The interface is very clean and neat and it is very clear how to save, edit, delete or produce your video. By clicking on the edit button you are taken to the very familiar Camtasia Studio screen to edit and produce your work. While not much has changed with regard to the interface there is lots of changes under the hood which will benefit all of us who work with this wonderful tool. This is the first version of Camtasia Studio that lets you decouple the video and audio which will make it easier to make edits and re-record the audio for retakes. TechSmith has now added a number of Hotkeys which will allow us to quickly add captions, callouts, zoom, and markers to the timeline. Just today I created a video and wanted to add a zoom in- and by simply pressing the letter z, I was able to bring up the Pan and Zoom dialog box and insert the zoom. This is certainly going to reduce the amount of time it takes to create and produce my videos. Like I said before, a lot of work has gone on under the hood which we will greatly benefit from. When it comes time to produce our videos TechSmith has really listened to our call and with the Production Wizard we can now output our videos to some of the most popular formats without the need to worry about the settings. We can now produce videos in High Definition (HD), SWF, as well as produce it for YouTube, Screencast and for the iPhone by going through the Production Wizard. In every case you will get perfect video and audio for that platform which is extremely important from my perspective- no need to guess. If you have a Screencast account you will appreciate just how easy it is to store and post your videos to your blog or web. The integration is seamless and within minutes you can have your video on your web or blog.


TechSmith has done a great job of listening to its users and making it even easier to produce high quality screencasts. It is the subtle changes and the work under the hood that will change your workflow and make you more productive using Camtasia Studio 6. The videos that I have recently recorded with Camtasia Studio 6 are very sharp with excellent audio fidelity. If you are on the fence about the upgrade to Camtasia Studio 6 take the plunge and see all of the benefits that you will derive with this very substantial upgrade. You can also download a 30 day trial of Camtasia Studio 6 form the TechSmith web site.

Sunday, September 7, 2008

Adobe Captivate 3- Awesome!

While attending the NECC Conference this summer in San Antonio I had the chance to stop by the Adobe booth and connect with some of my colleagues who work for Adobe to find out what is the latest and greatest. At the Adobe booth I was shown several of the new releases which included Captivate 3, Adobe Acrobat 9 Professional, and Presenter 7. One of the Sales Engineers gave me a tour of Captivate 3 which really wowed me. Many of you know that I have been producing software video tips and tutorials for the past year or so for the Mindjet Newsletter which goes a long way for showing others how to accomplish tasks using MindManager 7 and JCVGantt Pro 3. Using screencasting software to demonstrated how to accomplish tasks with a particular software product makes the process of providing "just in time training" a reality and can cut down on support calls at the workplace. I want to thank Jody at A&R Edelman for providing me with a copy of Adobe captivate to review and to RJ at Adobe for doing a great webinar with me on Adobe Captivate 3.

For the past several years I have been using Camtasia Studio 5 extensively to do my screencasting work and find it to be an outstanding product to get my work done. Camtasia Studio 5 lets you record your screen and then provides you with post editing tools to fine tune your screencast. Camtasia's approach to screencasting is similar to that of taking a video camera and pressing the record button. With this approach every screen and all of the audio is continuously being recorded. Any mishaps or errors while doing the recording will need to be post edited or in some cases need to be re-recorded. Adobe Captivate 3 takes an entirely different approach to capturing your computer screen which has some real benefits. Adobe Captivate 3 captures individual screen shots only when you move the mouse, click on the screen, or type some text. When you are finished capturing your screens Adobe Captivate 3 pulls all of the screen shots together and builds a Flash video of your demonstration. You also have the opportunity to add audio to your demonstration while you are creating your video or after the process is complete. One of the really nice features of Adobe Captivate 3 is the ability to not only create demonstration-but you can in one fell swoop also create simulations, training, and assessment videos. You can watch my screencast to get an idea of how Adobe Captivate 3 works.

I have found that using Adobe Captivate 3, I can create custom demonstrations videos very quickly, with Adobe Captivate 3 doing a lot of the work for me. What do I mean by that? When I am creating a video demonstration Adobe Captivate 3 will automatically include captions when I am selecting menus, dialog boxes and clicking on the screen. Watch the video to see what I mean. In the demonstration video you will see a number of captions that have been generated by Adobe Captivate 3. All of the captions can be edited and formatted if you need to. Having Adobe Captivate 3 generate the captions saves a lot of time when producing these videos. I have chosen not to use audio in this demonstration but if I wanted to I could always go back and add narration to the demonstration video. As I work with Adobe Captivate 3 I I find it an outstanding tool to work with to create video demonstrations and training scenarios. I will over the next couple of weeks share with you some other tips and tricks that I have learned about Adobe Captivate 3 - so stay tuned.

Sunday, August 10, 2008

Using the MindManager Web Launcher

Having access to Mindjet Connect is really wonderful for some of the business projects I am working on. It is a wonderful collaboration tool and gives me access to all of my MindManager maps. For those of you who may not be familiar with Mindjet Connect it is a collaborative workspace that lets me in real time share my MindManager maps and associated files. Being able to work with one of my colleagues on some of my maps in real time is a very powerful feature. Additionally, I can also store supporting Word documents, PDF files, etc in my workspace for easy access. If you have a Mindjet Connect account and are running MindManager 7 on a Windows computer, Mindjet Connect is seamlessly integrated. This is not the case if you are a Macintosh user but here is a little trick that you should be aware of. Mindjet recently released a MindManager Web client that lets you launch your MindManager maps right from the browser. Using Firefox I am able on my MacBook to access all of my MindManager maps and associated files. Having access to the MindManager Web client lets me have access to all of my files as long as I'm connected to the web. What a great feature! I created a screencast using Jing to show you how the MindManager Web client works.

Thursday, July 24, 2008

Jing Turns One!

Happy Birthday to Jing Project which celebrated its first year in production. I have used Jing in my courses and continue to use it for quick video tutorials. Techsmith in honor of its first year birthday has double the amount of storage and bandwidth on Screencast. So now you automatically get 2 GB of storage space to store all of your Jing screencasts. What a great deal! It looks as if there will be some premium services built around Jing in the coming months based on the email that I received. So go enjoy your new found freedom to create more Jing projects!

Wednesday, June 18, 2008

Mindjet Connections Newsletter

If you have a chance go over to Mindjet where you see a total redesign of their website. With the release of Mindjet Connect and the recent acquisition of JCVGantt there is a lot happening at Mindjet these days. Each month I have the opportunity to share a Tip 'n'Trick via the Mindjet Connections Newsletter. This month I created a screencast giving you an overview of Mindjet Connect which is a great collaboration tool. For the past month and a half I have been using Mindjet Connect with my team of presenters as we prepare for the October 2-3, 2008 Visual Mapping Conference to be held in the Greater New York City Area. Mindjet Connect has been indispensable as we plan the conference. All of our maps, Word documents and PDF's are stored in the Connect Workspace for easy access. There are times when my co-presenters will work and edit the maps in real time- which is really a tremendous feature. With all of the maps and files for the conference n Mindjet Connect all of the presenters can keep on top of the schedule and gain access to the files if they need them. Having presenters all over North America and in Europe makes it easy for them to access them according to their schedule. So take a look at the screencast and then if you have the chance give Mindjet Connect a try!

Sunday, April 6, 2008

Applying Jing in the Classroom

This morning I received an email from one of my graduate students who was working on a software project who said she was stuck and didn’t remember how to add a Note card in her ClozePro project. My first inclination was to write her a long and complex step by step process and email it to her. However, on second thought, I decided that it would be a lot easier to create a quick Jing video and show her exactly what needed to be done. So I opened Jing on my MacBook and recorded a 20 second video showing my student, Donna how to create the Note card in her project. Once I created the video, I sent my student an email with the Jing link so that she could view the video. Here is her response.

Dear Dr. Friedlander-thank you. I am just so fascinated by all this new
technology. I will revise my work at the college today or tomorrow. Your
e-mail response just blew me away. It was great to see that visual
presentation. Have a nice Sunday......Donna
If a picture is worth a 1000 words then a video has to be worth at least a million! So remember the next time one of your students asks you how to do something why not create a quick Jing video. It’s just an idea!

Saturday, February 16, 2008

Consultant for Hire

Yes- I know this is a shameless plug but why not, this is my blog. I have been doing a lot of work with MindManager Pro 7 and some of the Third Party Add-ins and feel that these are some really powerful tools to help professionals and business people manage the onslaught of information that we need to handle. If you are interested in finding out how I can help you use these tools to solve your business or professional need, please feel free to email me. Additionally, I am available to help your organization create video tutorials for in house training using state of the art screencasting software. If you look at my blog you will see some examples of the work that I have done using Camtasia Studio 5.

Tuesday, December 25, 2007

MindManager 7.1 Screencast


With the recent release of MindManager 7.1, I created this screencast to show you some of the new features that have been added to this release.

Here is the link

Friday, November 30, 2007

Jing Project Updated

I have been using Jing Project on my Macintosh and PC since it has been released and have found it to be a wonderfully handy application for capturing images and screencasts. I just read on the TechSmith Blog that Jing Project has been updated and now includes the capability to upload your screen captures directly to Flickr. I downloaded the upgrade and was able to quickly configure Jing Project to upload my captures to Flickr. It was very straightforward and easy to do. TechSmith should be applauded for developing and supporting this incredible application that makes it easy to capture images and videos from your computer. What better way to tell you about the new release of Jing Project then by showing you with this screencast.

Wednesday, September 12, 2007

Creating MediaRolls with Screencast.com

Here is a new way to display your screencasts if you are using Camtasia Studio and Screencast.com. This is a pretty neat widget that shows a list of the screencasts that you have created. Let me know what you think.


Tuesday, August 28, 2007

SnagIt Output Updated for MindManager 7


One of the handiest utilities that I use to capture screen shots with, is SnagIt from TechSmith. One of the features which is really fantastic is SnagIt Outputs. I just recently found out that TechSmith updated the SnagIt output that can now be used with MindManager 7. If you have MindManager 7 open when you are using SnagIt you can use the MindManager Output that will copy the screen shot and place the image right within your mind map. It is very easy to use and very handy to have in your toolbox. I created a short screencast to show you how it works. If you need more information about SnagIt just go to TechSmith.

Tuesday, July 17, 2007

Got Jing?

I had the opportunity to get a preview of new application called Jing, from the makers of Camtasia Studio and it is really awesome. Think about all of the times that you want to grab a picture of something on your screen and send it to someone that you may be IMing. Or say you want to quickly show someone how to use a feature in a software application and want to do a quick screencast. If you have ever been in this situation then you need to take a look at Jing. Jing is a software and sharing tool that is available for Mac and Windows which lets you share pictures and videos very quickly. The Jing application is always available and with a user defined hot key you can get it started. Once you have grabbed a screen image or recorded a video you are immediately given a URL that is copied to the clipboard to use. The images and videos are stored on your Screencast account that you will be prompted to create the first time you use Jing. This is a very handy utility and one that I know I will be using often in the work that I do. It is a great tool for Just in Time training. Here is an example of what you can do with Jing.

Thursday, June 28, 2007

Hiding the Ribbon in Mindmanager 7

Many of us are really enjoying the new Fluid Ribbon Interface in MindManager 7, which has made the program much more accessible. However, there are times when we might want to hide the ribbon once we start working on the mind map. Here is a tip on how to hide the ribbon in MindManager 7. I hope that you enjoy this tip!